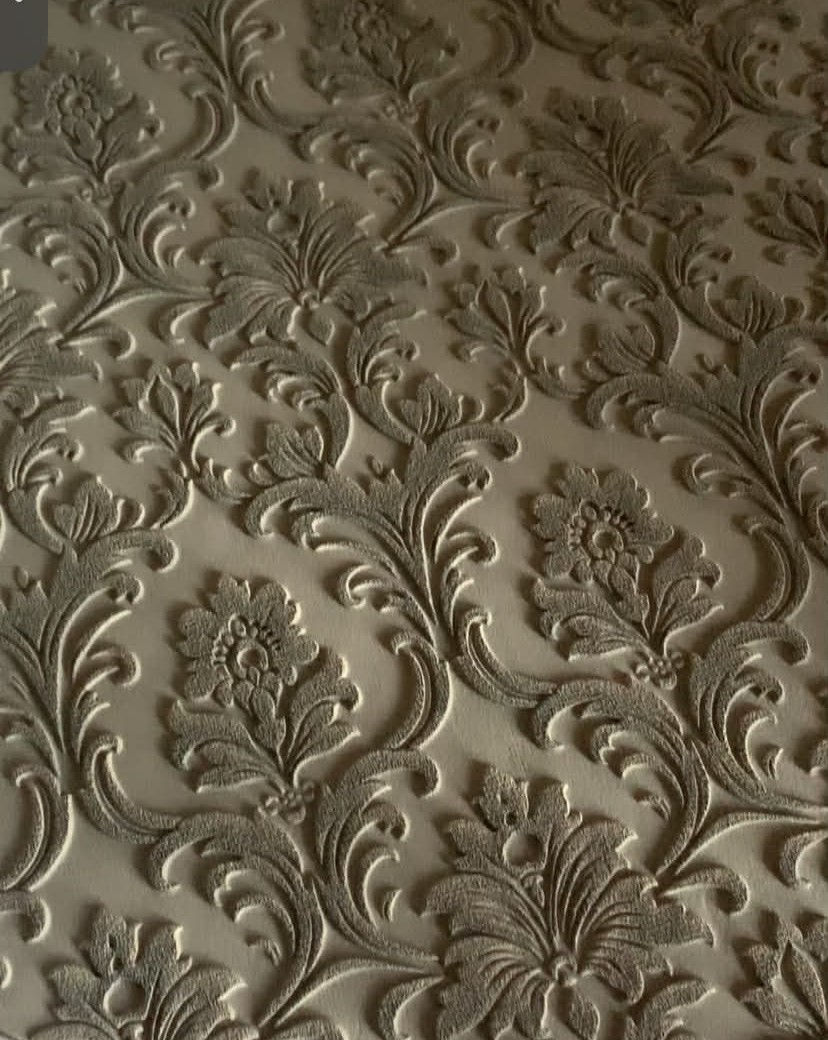

Texture tools for potters, by a potter
Magpie Texture Co. designs flexible, durable texture tools for handbuilders and functional potters.
Each texture is developed through my own making practice, with a focus on:
-
clean impressions
-
reliable release, and
-
tools that support repeatable, thoughtful design.
Texture sheets form the core of the range, with optional systems, feature sheets and focal accent tools that allow you to build cohesive sets over time.
Designed in a potters studio.
Every Magpie texture is tested in clay — pressed, peeled, formed, and pushed into real functional shapes before it’s released.
The tools are designed to work:
-
on their own
-
across multiple forms and
-
as part of a growing system.
This is slow, considered product development — and it shows in the results.
Explore by Category
Modular texture tools designed for pottery, dinnerware and slab-built ceramics.

Versatile workhorses. Large-format textures designed for dinnerware, slabs and sculptural ceramic work

Designed focal compositions that can be used whole, masked, or in sections across forms and collections.

Form and masking templates designed to create cohesive ceramic collections across plates, bowls, mugs and pitchers.

Compact texture sheets designed for mugs, small forms and everyday making, while remaining flexible across trays, dishes and slab projects.

Smaller feature elements designed to add detail, storytelling and layered focal points to ceramic work.

Layered texture components designed to mix, frame and combine for flexible surface compositions.
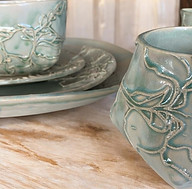
Composition-led ceramic collections combining original Magpie tooling with authored surface design across cohesive tableware and functional forms.

Explore the complete Magpie Texture Co. collection, including textures, templates, modular systems and focal accents.
About Magpie Texture Co. Textures

We use dense EVA foam as the flexible base for all our texture tools—because it’s the cleanest, easiest way to get crisp, repeatable impressions.
Why we choose EVA foam
-
Flexible fit: It hugs curves and wraps mugs and handles so your pattern contacts evenly.
-
Easy release: Closed-cell surface lifts cleanly off clay—no suction, no smear.
-
Quick to clean: Non-porous; clay and underglaze rinse off in seconds.
-
Hard-wearing: Dense, tear-resistant foam that stays true without denting, fraying or chipping.
What that means for your making
-
Sharper detail, fewer bald spots thanks to even pressure across the surface.
-
Better placement because the backing bends and lets you see what you’re doing.
-
Versatile use on slabs and soft leather-hard forms—press, roll, or wrap.
Material & care
-
Material: Closed-cell, dense EVA foam (lightweight, non-absorbent)
-
Care: When needed, scrub gently with a soft nail brush, rinse, air dry, store flat or upright with no heavy objects on top; keep away from heat/flame
-
Longevity: Resists compression set for consistent results, batch after batch
How to Use Your Texture Mats & Stamps
-
Prep the surface. Lightly dust the mat and/or your clay with talc or corn starch. (Avoid creating airborne dust.)
-
Find the right clay feel. Aim for soft but not wet. I often roll a slab and let it sit briefly so the surface dries off slightly.
-
Press evenly. Lay the mat on your slab and roll or press firmly and evenly across the whole area (use a roller, brayer, or flat board).
-
Peel slowly. Peel back carefully from one edge while holding the slab down with your other hand.
First pull note: You may see a little black dust on your clay—that’s harmless laser soot and it burns off in the firing.
Dialling in the perfect impression
-
Release aid: A light dusting is usually enough; too much powder can soften detail.
-
Clay moisture: If the pull doesn’t come cleanly, your slab may be too wet—let it air a minute—or the mat just needs a touch more talc. Smooth the slab with a rib and go again.
-
Multiple pulls: During a run, the mat/stamp can get damp and cling to clay. Redust lightly or wait a moment between impressions so mat and slab can dry off.
-
Helpful residue: A thin residue of dry clay on the mat actually improves release next time—don’t scrub it spotless after every use.
Troubleshooting quick fixes
-
Fine lines holding clay? Sometimes tiny grooves catch a whisper of clay. Gently scrub with a soft toothbrush or nail brush, let dry, and dust before reusing.
-
Patchy impression? Press more evenly (work from centre out), or add a sheet of baking paper and roll over the top for uniform pressure.
-
Edges lifting while peeling? Peel low and slow at a shallow angle; keep gentle downward pressure on the slab.
-
Overly bold / mushy detail? Clay is likely too soft/wet—let the surface firm up slightly before pressing.
Care & cleaning
-
Tap the mat to shake off loose clay; dry-brush if needed.
-
If you do wash, use cool water sparingly and let the mat dry fully before storing or reusing.
-
Store flat, dusted, and out of direct heat/sun.
Safety & material notes
-
Use talc or corn starch sparingly and avoid inhaling dust (a light mask and good ventilation are sensible when dusting).
-
A small amount of laser soot transfer on first use is normal and burns out during firing.
-
Compatible with soft slabs and firm leather-hard surfaces (test pressure to suit your clay body).
Pro tip
For consistent results on mugs and repeat pieces, mark a light registration line on your slab and press in the same direction each time—your pattern alignment stays crisp, and your workflow speeds up.
Design and Licensing
I design every texture tool in-house for clay. Some begin as my original drawings; others start with properly licensed graphic elements that I rework, combine, and engineer specifically for pottery—tuning line weight, relief depth, spacing, and peel quality so they impress cleanly on slabs and cylinders.
I don’t resell source artwork, and I keep a provenance log for each design.
You’ll see two labels across the range:
-
Studio Original – motif and tooling created in my studio.
-
Studio Remix – elements sourced under commercial licence, then re-composed and engineered into an original tooling layout for clay.
Either way, every sheet and stamp is tested in real clay and made here in Aotearoa.